User Guide
Survivor
Lantern
All-in1
10000
Volume Down Decrease the volume
of the radio
Volume Up Increase the volume
of the radio
Left DAB: Previous station
FM: -0.05 MHz
FM: Search for previous
station
Right DAB: Next station
FM: +0.05 MHz FM: Search for next station
Settings Toggle radio text information Enter menu
User guide
Product overview
2
No. Description Function
1 Lantern Extend the unit to use the lantern
2 Handle You can use the handle to carry or hang the unit
3 Display Shows information about the current station/song/artist
4 Speaker Here are the two loudspeakers of the radio
SOS button Press SOS button to play a loud siren sound and
activate the emergency light
5
6
Torch on/off Lantern on/off
Press to activate torch, press again to change torch If the unit is extended, the button activates the lantern
Button Short press
No. 7 Radio control buttons
Long press
On/Off/Mode Turn radio on / change
mode (DAB / FM / Bluetooth)
Standby mode / turn off completely when already in standby
Favourites Open a favourite radio
station
Save current radio station to favourites
Confirm Confirm any selection Start full scan in DAB / FM
1 2
3
5 6
7
4 4
3
Antenna Extend antenna to full length for best reception
10
11
Torch /
Emergency Light
Bright torch to use during night time.
Emergency light flashes if SOS button is pushed
No. Description Function
Solar panel Face the solar panel to the sun
to recharge the battery
8
9
Hand crank Turn hand crank to manually
recharge the internal battery
Charging Indicator LED blinks red while charging and
turns solid red when full
Reset button Hard reset the radio in case of software error
No. 12 Connectors
USB output Power bank function to charge
any mobile device
USB-C charging Use to recharge the integrated
battery of 420-90
9
8
11
12
10
User guide
Functions
4
Standby mode.
To put the radio into standby mode, long press the On/Off button. To reactivate the radio, short press the On/Off button. To fully turn off the radio and preserve battery life, long press the On/Off button again in standby mode. No alarms are available, when the radio is turned off completely.
In standby mode, press the settings button to quickly view your currently set alarm settings, or press the OK button to quickly jump to the alarm settings wizard.
Mode selection.
To select the desired audio mode, short press the mode button, while the radio is turned on. The available audio modes are:
• DAB+ digital radio • FM analogue radio • Bluetooth wireless audio
DAB+ digital radio mode.
Use this mode to listen to digital radio broadcasts. You can cycle through available stations with the left and right buttons. To access more functions, open the menu by long pressing the settings button.
Navigate the menu with the left and right buttons, and use the OK button to confirm. To exit the menu use the settings button again.
DAB+ station search.
The radio automatically performs a full station search when you turn it on for the first time.
If you would like to perform a full station scan again at a later time (e.g. after moving), press and hold down the OK button for approx. 2 seconds.
User guide
5
Station list.
After the scan is complete, you can view all currently available stations in the station list, accessible in the menu. Navigate through the list with the left and right buttons and confirm your selection with
OK.
Saving / recalling a favourite station.
If you want to save the current DAB+ station as a favourite, press the favourite button for about 2 seconds.
To recall a favourite later, short press the favourite button.
DAB menu.
The DAB menu contains the following options:
Trim invalid stations: Prune unavailable stations from station list.
Station order: Sort stations in the station list by name or frequency.
DRC: Adjust the level of the Dynamic Range Compression, reducing the volume differences between
loud and quite passages.
Manual tune: Manually tune a DAB frequency.
FM radio mode.
Use this mode to listen to analogue radio broadcasts. You can cycle through available stations by long pressing the left and right buttons. To access more functions, open the menu by long pressing the settings button. Navigate the menu with the left and right buttons, and use the OK button to confirm. To exit the menu use the settings button again.
FM station search.
To perform a full station scan, press and hold down the OK button for approx. 2 seconds. All found radio stations will be saved in the favourite station list.
User guide
6
Station list.
After the scan is complete, you can view all currently available stations in the station list, accessible in the menu. Navigate through the list with the left and right buttons and confirm your selection with
OK.
Saving / recalling a favourite station.
If you want to save the current DAB+ station as a favourite, press the favourite button for about 2
seconds.
To recall a favourite later, short press the favourite button.
DAB menu.
The DAB menu contains the following options:
Trim invalid stations: Prune unavailable stations from station list.
Station order: Sort stations in the station list by name or frequency.
DRC: Adjust the level of the Dynamic Range Compression, reducing the volume differences between loud and quite passages.
Manual tune: Manually tune a DAB frequency.
FM radio mode.
Use this mode to listen to analogue radio broadcasts. You can cycle through available stations by long pressing the left and right buttons. To access more functions, open the menu by long pressing the settings button. Navigate the menu with the left and right buttons, and use the OK button to confirm. To exit the menu use the settings button again.
FM station search.
To perform a full station scan, press and hold down the OK button for approx. 2 seconds. All found radio stations will be saved in the favourite station list.
Setting the FM frequency manually.
Press the left and right buttons briefly to set an FM frequency manually. The frequency is adjusted in
0.05 MHz steps.
Saving / recalling a favourite station.
If you want to save the current FM station as a favourite, press the favourite button for about 2 seconds.
To recall a favourite later, short press the favourite button on the radio.
FM menu.
Other menu items in the FM menu include:
Scan settings: Restrict the full scan to strong stations only.
Audio settings: Only allow mono stations to improve reception.
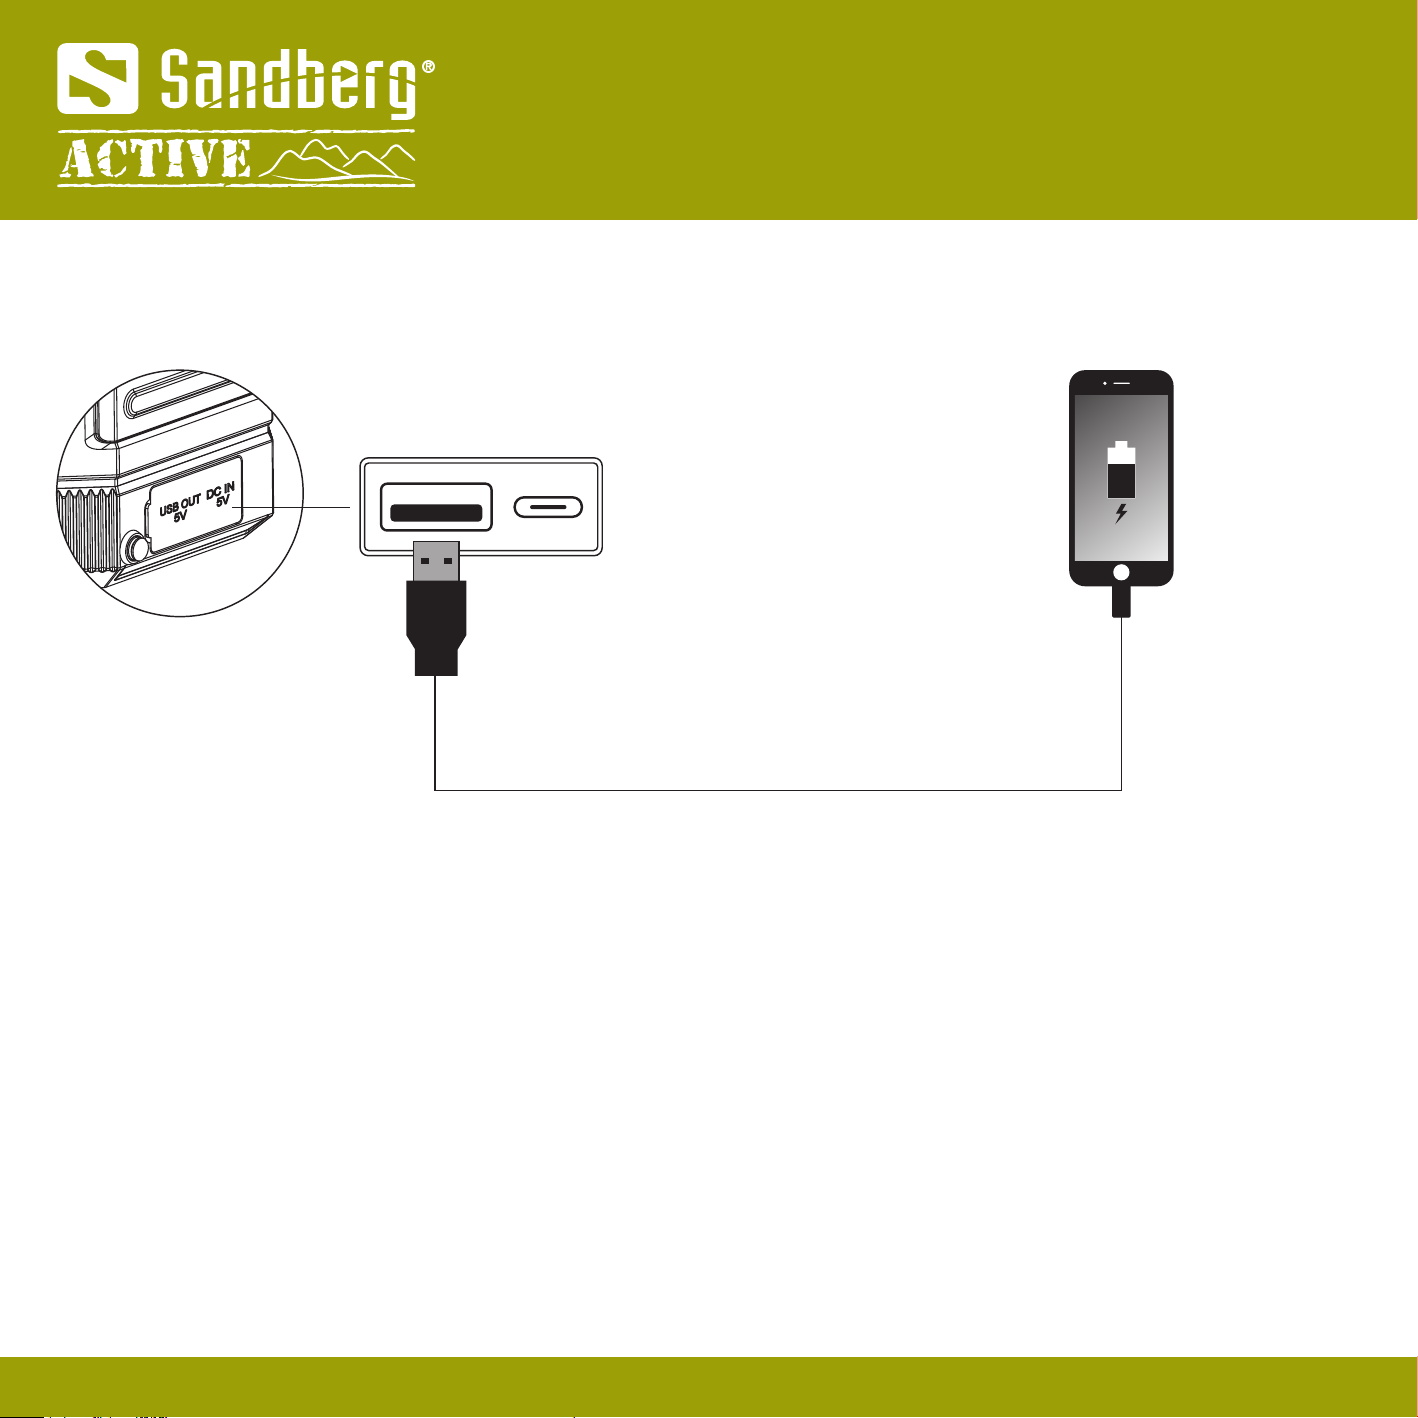
Wireless music streaming (Bluetooth).
A Bluetooth-enabled mobile phone can be used for wireless playback of any audio content. For this purpose, you need to activate the "Bluetooth" mode by pressing the mode button. Once this is done, search for "Sandberg 420-90" on your mobile device. For more details about operation of your mobile phone, please refer to the device's manual.
System setup.
You can find the system setup in the menu of every audio mode.
Alarm.
Use this menu to configure the alarm function. Two separate alarms can be programmed. Each alarm can be repeated daily, on weekdays or on weekends. The alarms can play a standard alarm sound or the last set FM or DAB station.
User guide
7
Backlight.
Use this entry to set the display backlight illumination level and timeout.
Time setup.
Use this entry to set time/date, change the time or date format or configure automatic time setting via FM/DAB.
Language.
Select one of the following menu languages:
English, German, French, Italian, Spanish, Danish, Finnish, Portuguese.
Factory reset.
Reset the radio to factory settings.
Attention: All settings and favourites will be deleted by this procedure!
Software Version.
The current software version of the radio is displayed here.
User guide
Charging the battery
8
Indicator
charging
100%
Charge options:
Turn the crank at 120 - 150 rpm (2 - 2.5 times a second).
1 minute of turning can power the radio for about 3 minutes.
Approximately charging time
by the hand crank (battery 0-25%): 5 hours
Make sure to place the solar panel in direct sunlight with no shadow.
Approximately charging time by the solar panel (battery 0-25%): 20 hours
Hand crank Solar panel AC charger
USB AC charger
USB-C
USB
User guide
Use this function in an emergency to alert people near your location. To activate, long press the SOS button on the bottom of the radio. The radio will play a loud siren and flash a red and blue signal light.
Attention: The siren is very loud. Prolonged close range exposure can cause hearing damage. Try to set up the radio some distance away, when using the emergency function. Use of the emergency function drains the battery at an excessive rate.
Charge device
SOS Emegergency Function
USB
9
User guide
10
To turn on the torch, press the button on top of the radio. If you press the button a second time, the light flashes.
If the lantern is extended, the button does not activate the torch, but the lantern light instead. This can be set to 3 different levels.
Torch and Lantern function
It's recommended to always keep the Lantern powerbank in a dry environment and with temperatures between 0° to +40°C. Never expose it to any liquids or high temperatures or even fire. This can cause the battery inside to expand or even explode or catch fire.
If the battery seems expanded or damaged, immediately bring it to a safe waste station for electronic waste.
To keep the battery intact, you need to recharge it at least every 6 months. Otherwise it can decrease its capacity and in worst case it can stop working. This stage of non-function will not be covered by the warranty.
Storage
White light Yellow light Warm light
NOTE: The torch and the lantern cannot be activated simultaneously.
Three light modes:
User guide
CE letter of
conformity
11
Warranty
There is a five-year warranty on your Sandberg product.
Please read the warranty terms and register your new Sandberg product at https://www.sandberg.world/warranty
Helpdesk
Years
Warranty
For information on handling electronic waste, see https://www.sandberg.world/weee
12
Capacity: 10000 mAh (37 Wh), USB-A output: 5V/2A
USB-C input: 5V/2A, Solar panel: 5V, 95 mA (0.48W max)
Product weight: 907g
Made in ChinaItem no. 420-90
Sandberg A/S
Bregneroedvej 133D,
3460 Birkeroed, Denmark
NOTE: For optimal battery performance, we recommend fully discharging and recharging the powerbank at least once every three months.